Showing posts with label recipes. Show all posts

Saturday, October 29, 2011

Pumpkin Seeds

I know that when most people carve a pumpkin, they want to get rid of the messy, seed-filled pulp found inside as quickly as possible.  They are really missing out on a tasty snack, though!  I have always roasted my pumpkin seeds by tossing them in olive oil and salt, but I have found a much, much better recipe! This time I used butter and added cinnamon - and the result was the Best. Pumpkin. Seeds. Ever.  You really must go out and buy a pumpkin, carve it up, and roast the seeds now. You won't be sorry.


Roasted Pumpkin Seeds
1 1/2 c. cleaned pumpkin seeds
2 TB butter, melted
pinch salt
dash cinnamon

Toss the seeds in the remaining ingredients and spread them on a baking sheet.  Place in a 300 degree oven for 45-60 minutes, until golden brown. YUM. These are especially tasty right out of the oven!

Tuesday, October 18, 2011

Cream Cheese Muffins

Several years ago, I started truly researching types of food and how our body reacts to different foods.  I began to look at GMO foods and issues, read a lot about eating local, in season foods, studied traditional foods (along the lines of Nourishing Traditions), and watched Food, Inc., Supersize Me, and other documentaries about the SAD (Standard American Diet).  I decided that our current way of eating was going to have to change.  I started eliminating processed foods from our diet, adding coconut oil, and trying some grass-fed meat options. 

Then, of course, the bomb dropped - food allergies. I had just begun a gradual overhaul of our entire way of eating when I learned that Jerry and my boys were allergic to all of God's green earth, and began a new research project - how to cook without any recognizable ingredients.  It has taken two years, but I now have a decent repertoire of recipes that the whole family can enjoy, and my boys' are healing - they are truly totally different after two years of treatment! 

Since all of that happened right after I had a baby, and I was only focused on learning how to cook non-allergenic foods for a long time, my weight got a bit out of control.  So once I re-learned how to feed my family, I began to try to lose some weight and figure out how to incorporate the changes I had started to make three years ago into our new-normal allergy-friendly eating plan.  It has taken some major creativity, plus some trial and error, but I finally have a plan that works! We now eat only foods our grandmothers would recognize (Which is really saying something since one of Jerry's grandmothers was born in 1899!), with a few exceptions, of course!  I don't worry about fat in our diet, but use non-hydrogenated fats, such as coconut oil, butter, and olive oil. We have learned to eat quinoa, millet, and add whole grains of all sorts to our diet.  We have eliminated about 80% of the chemicals we used to consume, and rarely consume corn syrup anymore. I have learned to be satisfied with a meal that consists only of meat, fruit, and vegetable much of the time, and no longer eat very many starches.  The result? I have lost a ton of weight and finally like the way I look, my kids are healthier and don't feel like they're missing too much, and we all enjoy the occasional treat and have discovered which of our "coveted foods" from before really don't appeal anymore.

A recent picture to document the end of my weight loss journey.

I've ended up using many low-carb recipes in my efforts to avoid wheat (for my allergic family) and other starches (for me).  I thought I'd occasionally share some of these recipes here, knowing full well that most of the world doesn't eat the way I do.  But if something I put out here looks good to someone, I'm happy to share.  I know my Green Smoothie wasn't a big hit, but these are much more normal looking, and really tasty! (I promise.) I enjoy a couple of these for breakfast or one for a quick snack.  They are best fully refrigerated.  It is like a mini-cheesecake, really!


Cream Cheese Muffins (Sernicki)
Muffins:
  • 24 oz cream cheese, softened
  • sweetener: 1 cup splenda or sugar, or 1/2 c. honey (honey changes the consistency some)
  • 2 tsp vanilla
  • 5 eggs
Topping:
  • 1 cup sour cream
  • 1/2 c. splenda or sugar, or 1/4 cup honey
  • 1 tsp vanilla
  • optional: 1 TB cocoa powder
Preheat oven to 300 degrees. 

Blend together cream cheese and sweetener.  Add vanilla extract.  Add eggs, beating in one at a time.  Pour into 24 paper cupcake liners (you MUST use liners with this recipe) in cupcake pan, filling liners about 2/3 full of batter.  Bake for 40 minutes.  Let cool for 5 minutes.

While muffins are cooling, beat all topping ingredients together. Spoon a bit of the topping onto each muffin, where an indention has formed from the cooling.  Return to oven for 5 minutes, then remove and cool. 
Even with another layer of muffins on top of these, this container empties quickly at my house since all 5 of use enjoy these!

Friday, October 7, 2011

Mean Green

Do you ever eat a green smoothie?  I used to be scared of the thought, until I tried this recipe! If you are looking for a quick, filling meal replacement, you should give this one a try!

Ingredients
  • 1/2 cup cottage cheese
  • 3 oz baby spinach leaves
  • 5 oz (about 7-10) frozen strawberries
  • 1 heaping TB cocoa powder
  • 20 drops stevia, or 2 pkts sweetener of choice
  • 1 cup water
Blend the ingredients until smooth and enjoy! Because of the strong flavors of strawberries and cocoa powder, you cannot taste the spinach.  However, if you use a different fruit or mature spinach leaves, you can.

Friday, August 26, 2011

Marshmallows

Have you ever looked at the ingredients on the back of your bag of marshmallows? With all of our food allergies, I sure have.  This is the list:
Corn Syrup, Sugar, Dextrose, Modified Corn Starch, Water, Gelatin, Tetrasodium Pyrophosphate (Whipping Aid), Artificial Flavor, Artificial Color (Blue 1).

Because of our corn allergy, this is obviously a food we should not be eating. Plus, no one really needs to be eating chemical binders, modified food, and artificial flavors and colors. Anyway, it is not a food we ate a lot, but every now and then, a marshmallow or two would be nice in some hot chocolate or rice crispy treat, you know? So I set about to figuring out how to make them myself.  Of course, my first stop in a recipe search was with Alton Brown! His recipe for marshmallows can be found here. I'm sure they turn out great, but they still have corn on top of corn with a side of corn. ::sigh::  Then across my blog reader came this post from The Nourishing Gourmet! I got excited about trying these right away.  Not only is there no corn or artificial anything, I like using honey instead of refined sugar when I can.  I had never made marshmallows before, but I decided to dive right in!

First I assembled my cast of characters:
And of course, I gather my helpers, too!

Then we put the gelatin in water to soften.
Then we put the honey, water, and salt in a pan to start to boil it together.
It takes a while to get up to 240 degrees, but me and my helpers kept a close eye on it knowing it would have to come off right at 240 on the dot.

After it gets to 240, start the mixer on the gelatin and slowly drizzle the hot liquid into the gelatin until it is incorporated.
Then turn the mixer up to high.

After about 10 minutes, it looks like marshmallow fluff!  I'm wondering if at this point it could be used for a fudge recipe that calls for a jar of marshmallow fluff...

Pour it into a greased pan lined with greased wax paper, then let it sit for 3 -18 hours.  It took all night for mine to get firm enough to slice.

Of course, you have to let the littlest helper lick the beater!

I cannot wait to try these in all kinds of things!


Wednesday, August 10, 2011

Frozen Banana Treats

Over the last year I got in a kitchen funk.  The two years of figuring out how to cook for my food allergic family took its toll on my creativity and I started to detest menu planning and recipe searches, something I used to *love* to do.  I also got in horrible habits once we started to be able to add back some of our allergens and we haven't been eating well.  I finally got fed up with feeding my family too many allergens (and reaping the consequences), eating the same food all the time, and not having options for my kids when they asked for a snack.  Also, Andrew has started to show some signs of food allergies (boo!!) and that was the final straw that caused me to become fed up with my lack of planning and creativity!

Enter Frozen Banana Treats - a great snack or dessert during these hot summer days!  Here's what I used to make these tasty bites:

  • 2 bananas
  • 1/4 c. chocolate chips
  • 2 squares unsweetened bakers chocolate
  • 1/2 c. almond butter
  • 2 TB coconut oil
  • unsweetened shredded coconut
You could easily alter these ingredients to suit your needs, using peanut butter, all chocolate chips and no squares or oil - it is very forgiving! I altered my ingredients from the original recipe, which I found on this blog The Spunky Coconut, by the way! It isn't one of her recipes, but it was in a link up there, and I cannot remember which blog it was originally from...

Anyway, melt all the ingredients together except for the shredded coconut, until it is just smooth, then allow it to cool.
While this mixture is getting cool enough to touch, slice the bananas into bite size pieces.

Line a baking sheet with parchment paper.  Dip each banana piece into the chocolate and set it on the baking sheet.  Once all the pieces are dipped, use remaining chocolate mixture to spoon over the top of each piece to make a thicker coating.  If desired, sprinkle coconut shreds on top.  Put the entire pan in the freezer for an hour or so until they are solid, then transfer to an airtight container.
These were a hit with my family! Next time I make them, I will leave out the chocolate chips (allergens) and use all baking chocolate sweetened with honey or coconut sugar.  With that change these will be quite healthy, and tasty to boot!

Tuesday, January 4, 2011

AB's Ginger Almonds

You should make these, they're good.

Ginger Almonds

Recipe courtesy Alton Brown, 2009

Ingredients

  • 1 tablespoon ground ginger
  • 1 teaspoon kosher salt
  • 2 teaspoons olive oil
  • 1 teaspoon dark sesame oil
  • 1 dried arbol chile, stemmed and broken into small pieces (or 1 teaspoon or less of chili pepper flakes)
  • 1 pound whole natural almonds
  • 1 tablespoon less-sodium soy sauce
  • 1 tablespoon Worcestershire sauce

Directions

Heat the oven to 250 degrees F.

Combine the ginger and salt in a large mixing bowl and set aside.

Heat the olive oil and sesame oil in a 12-inch saute pan over medium-low heat. Add the arbol chile and cook, stirring frequently, until the chile begins to give off an aroma, 30 to 45 seconds. Add the almonds and cook, stirring frequently until lightly toasted, approximately 5 minutes. Add the soy sauce and Worcestershire sauce and cook until reduced slightly and the pan looks dry, approximately 1 minute. Immediately remove the nuts to the large bowl and toss with the ginger mixture.

Spread the coated nuts into a single layer on a half sheet pan lined with parchment paper and bake in the oven for 20 minutes. Remove the pan to a cooling rack for at least 30 minutes or until completely cool. Store in an airtight container for up to 1 week.

Friday, June 18, 2010

Wheat

We just got some food back in this last month, and wheat is one item we can now add to our rotation. We can have some wheat twice a week, and I have to tell you that this is very exciting for me!  I have missed pasta.  Tomatoes are still out, so a traditional Italian pasta dish is still out, but pasta is quick, easy, filling, and cheap.  We have dabbled with bits of wheat here and there, but I finally finished our new, revised schedule for foods and yesterday was our first full-fledged wheat day.  For dinner I made a great Olive Oil and Garlic sauce for pasta and added chicken and broccoli.  Oh. My. Word.  It was so good! All four of my guys asked for seconds!  I'm sure to the average person it would have just been an average dinner, but to us?  This was special, amazing, magical even.

The picture doesn't do it justice, but I was too anxious to dig right in to stop and get just the right picture for you all.  Sorry about that. No.  Really I'm not sorry.  I am a bit sorry that I'm not sorry for caring more about getting into the pasta than getting a good picture for you, though.  What? I lost you with all the sorries?  Oh.  Sorry.

I was equally excited about dessert.  I made a chocolate cake and frosted it with this frosting that I had seen on Tasty Kitchen. (I couldn't make a regular frosting since powdered sugar has corn in it and it isn't a corn day...) I don't know if it is because I bought whole wheat white flour or if our tastes have just changed that much, but we didn't really enjoy the cake that much.  Or the pancakes I made this morning, for that matter.  I am determined to keep trying, though, because wheat flour is about 1/5 the cost of spelt flour and 1/7-1/10 the cost of the other flours we have been using.  Oh, and it is already ground for me.  You know? Maybe that's it.  Maybe I should buy some wheat berries and grind them myself.  Perhaps we are just used to the taste of freshly ground flour now. 

Either way, the bottom line is the same.  We love pasta.  We've missed pasta.  We'll be adding pasta to our regular menu again with rejoicing.  However, the other wheat flour items?  Well, their just not all we remembered.

Wednesday, January 20, 2010

Marie's Beans

When Marie posted her Green Bean recipe on her blog, I was so excited to try it.  It looked fantastic, and I never would have thought to add some rice flour to the beans in place of the bread crumbs the recipe originally called for.  I had planned to make them the very day she posted them because we have to rotate butter and rice (fortunately for me on the same day!) and it just happened to be the right day.  However, when it came time to make dinner, I went to my computer to look up the recipe on Marie's blog and to my horror, found that I had no internet service!  I was so perplexed, because our phone goes through the internet, and it still worked fine, but I could not get my computer to connect to our wireless connection.  Well, the next morning I finally figured out the problem - I had accidentally switched off the wireless function on my laptop.  DUH! Oh, well.  Then by the time it was butter/rice rotation again, we were doing our three-day shot diet (bleh), but I finally got to try it last week. (And I'm just now posting because that's life.)


I forgot to take a picture of these while they were all pretty on the plate, so I had to settle for a picture of the leftovers in the pan before I gobbled these ones up, too!

Anyway, the beans were fabulous!  Just the right touch of garlic, still slightly firm, buttery, and yummy!  Even Jerry, my green bean hater, said they were okay.  Let me tell you, that is a ringing endorsement from him!  I happened to be out of rice flour right at the time I made them, so I substituted Teff flour instead.  Teff is an African grain seed that has a really nice nutty flavor.  It was good!  Thank you, Marie for the recipe!  It is a keeper in this house!  Next I am going to try it with some frozen beans.  I get some really good frozen organic green beans at Costco.  They are the only frozen green beans I'll eat.  Normally, I think the frozen ones are nasty (I'd rather eat canned), but these ones are nice.

Saturday, November 21, 2009

Yummy Brussels Sprouts

Okay, I know what most of you are thinking, "Yummy and Brussels sprouts cannot exist in the same sentence!" and I have to admit that I used to think the same thing.  Most people think that Brussels sprouts are God's cruel joke on man via the vegetable kingdom, but I'm here to tell you that when they are prepared the right way, Brussels Sprouts can be yummy.  I promise.  Really!


So you need to start by getting some Brussels sprouts, between 1/2 and 1 pound.  Look for smallish ones.  Wash and trim any funny looking spots from the ends.  If you buy them on the "Reduced for Quick Sale" rack like me, you'll have to do a little extra trimming, but once you're done no one will know!  Well, unless you post it on your blog.  Then your readers will know, but for me that's only like three people, so we're still good here.


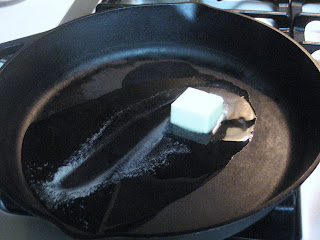
Go ahead and melt 1-2 Tbsp. olive oil with 1-2 Tbsp. butter in a cast iron skillet.  I know that's a lot, but you're worth it.  You can diet next week!  When it is hot, add 2 cloves of garlic that have been given a rough chop.  Now is not the time to try to save time and put it through your garlic press.  I know you want to, but really, don't.  You need to be able to remove it later with a slotted spoon, and if you pulverize it in the press, you won't be able to do it and the recipe will be totally ruined.  Okay?  Plus, you'll thank me later when you get a burst of intense roasted garlic flavor while eating.  Mmmmmm....


Anyway, while the garlic browns, remove your baby from the drawer he likes to pull out with all the glass pots and lids a few times and pray fervently that your husband will be home from work soon. I'll pray with you, cause I know how it is.


Once the garlic is lightly browned, remove it to a small bowl, turn the heat down to medium-low, and with a slotted spoon and add the sprouts, cut side down, to the pan.  On top of the sprouts, sprinkle 2 Tbsp. of pine nuts (other chopped nuts will work, too), and a generous amount of coarse salt.  Let these cook like this for 15 minutes until the bottoms of the sprouts are nicely browned. 


If, like me, you had a doofus for a carpenter building your house, rotate your pan every now and then so the butter/oil mix doesn't pool down at one side of the pan and leave the other side's sprouts loveless.  It would be cruel to them and to the person who has to eat those sprouts. ::ahem::

When they are beautiful, remove those sprouts with tongs to a serving plate, or if you're ghetto like me, just toss them aside on anything that will keep them until the next step is done.  Then add your garlic, along with a touch more of butter, back to the pan to let the pine nuts get a nice golden brown to them. (See note on your worth and diet plans above.)  At this point, it is important to breathe in deeply, because nothing smells quite like roasting garlic with pine nuts.  Yum!

(No picture here intentionally.  Please see paragraph below for reason. Thank you for your cooperation.)

This is the time that you quickly plug in your camera battery charger, cursing politely that your camera is flashing that red "low battery" light at you, and pray that it gets enough charge in it to finish photographing the recipe since you've put all the sprouts you have in the one pan and cannot make it again soon.  Go ahead.  I'll pray with you, cause I know how it is.

After a minute, your pine nuts will be a lovely brown color and taste great.  If you followed the directions and put your Brussels sprouts in a serving dish, pour the garlic, nut, butter mixture over them and serve.  If you're ghetto like me, turn off the flame, dump the sprouts back in the pan, and give them a little shake to mix everything up.  You're done!  Taste them - aren't they good this way?

Monday, October 26, 2009

Mini Post Monday

Here are some more of my thoughts from this past week:
  • The wheels are definitely turning in Andrew's head!  I was playing with him with a football, and I repeated the word "football" several times before handing him the ball.  Once he had the ball, he looked at it and then promptly put it on his foot!
  • What is it about the dishwasher that no kid on earth can resist?
  • I now know why shoving a piece of wood under someone's fingernail is a form of torture.  Let's just say that I have a bleeding bruise extending 1/8 inch past the quick of my nail.  I think 1/8 inch doesn't sound like much until it is measuring how far a piece of wood shoved up under my fingernail.  Then it sounds really, really long.
  • I'm going to go on a fast from TV.  I watch way, way too much TV and it gets in the way of doing things that are actually important.  Marie, do you still want to do it with me?  Anyone else want to join?  I know for sure I am going to do it for a week, but I think I will actually extend it until Thanksgiving.  I just went through and deleted shows from my DVR that I knew I could do without.  I may go insane.  Hopefully I won't.
  • Ethan read his first real words this week: at, am, an, and ad.  He was so happy to be able to say he actually read something!
  • Ethan displaying the page in our reading book that he read for me.  Don't you love that look of accomplishment on his face?  Now that's why I homeschool.
  • This past Thursday, we marked one full year since our dossier was logged in at the CCAA (China's Central Adoption Agency).  It seems that we are no closer to actually getting our baby girl than we were a year ago.  Our immigration approval expires in December and we are just going to let it lapse because we need a new home study since we had another baby since our last one and there just isn't time.  We'll renew again when we're closer to actually getting our baby.  Right now, our best estimate is another two years, but there is no way to truly know.  I try not to think about it, because honestly, thinking about how far away that is makes me want to cry sometimes.
  • One of the things that keeps me from crying when I think about the long wait for Hannah, and what keeps me praying for those people who are adopting as their only means of growing their families.  May your wait be shorter than short.
  • I found a great recipe for chocolate icing this week.  I'm serious when I tell you that this icing will make you roll your eyes into the back of you head while whispering the words, "Oh, mama!"  It may also cause you to eat large quantities of icing right out of a bowl, for which I will claim no responsibility!  Oh, and it's really cool that this recipe doesn't use powdered sugar for those times that you are out of powdered sugar and for the fact that powdered sugar has cornstarch added and we are allergic to corn.
  • Okay, so this picture has nothing to do with the posts above or below it, but really, who doesn't want to see a picture of a six year old in a playpen?
  • Wanna take a guess at what I'm doing right now while adding the finishing touches to this post?  Nope.  Nuh-uh.  Ooh, you in the back - did you just say making pancakes?  You're right!  I'm making my pancakes for tomorrow morning's breakfast now, at 9:23 PM so that I can go to the gym tomorrow morning rather than stand over a griddle and still have breakfast on the table by 6:45 AM.  You heard it here first, folks.

Friday, September 25, 2009

Turkey Sausage


I am the type of person that has to have some protein with every meal, especially breakfast. If I don't, I'm hungry again in just a couple hours. This has been a real challenge for me since finding out I am allergic to eggs. I used to eat the same breakfast every single morning: one egg, one piece of fruit, a small yogurt, and some sort of bread (muffin, toast, 1/2 bagel...). Saturday was my only deviation when I made pancakes or waffles and ate those with peanut butter and syrup. Well, now I can only have eggs 2 mornings a week, so I needed some sort of new protein options that aren't things we're allergic to. Like most people, my mind went straight to breakfast meat. The problem is that most breakfast meat you can buy has some sort of soy filler, corn syrup, or pork - all of which we are allergic to. So the hunt was on for a recipe that I not only like, but is easy to make. That's when I found this recipe. Most people think of turkey sausage as the "healthy" alternative to "regular" sausage that never quite lives up the the "real" thing. This sausage is really good, though! I like it better than any pork recipes I have had. Even if you like and can eat store bought sausage, you should really try this recipe. I made enough changes to it, that I'll type out the recipe I ended up with here.

Turkey Apple Sausage

1 lb. ground turkey
3/4 cup grated apple (I used my food processor)
1 Tbsp. maple syrup (grade B)
1 tsp. black pepper
1 tsp. salt
1 Tbsp. poultry seasoning
1/4 tsp. all spice

Mix all the ingredients together thoroughly and shape meat into 8-12 patties. Cook in a med-hot pan with some olive oil until brown on both sides and cooked through.

These reheat well, but are really, really yummy fresh out of the pan!

Tuesday, June 9, 2009

What's Your Favorite Candy?

High on my list are those yummy orange slices. I made some candied orange peels that taste exactly like those. Yummy.

Sunday, April 19, 2009

Salad Anyone?

Since I began to serve on my church's Women's Ministry Board, I have been able to do many new things. I now publish a church newsletter for the women that has become a ministry all of its own, use Microsoft Publisher like a pro, know how to use nifty machines that fold paper into a variety of folded brochure type shapes, can speak in front of the entire church without so much as a nervous sweat...I have discovered that I very much enjoy serving my fellow sisters in Christ through leadership and organizational duties. Yesterday, I got to try something new again - prepare a salad to feed forty women! I didn't want to bring a plain salad with various bottles of dressing (although there would be nothing wrong with that), so I put together this beauty:

You should try it! (Although, you should probably scale down the amounts...)

Johanna's Extra Tasty Salad (feeds 40)

  • 9 pounds spring mix lettuce
  • 3 Granny Smith apples
  • 2 bags dried cranberries
  • 1 large bag chopped walnuts
  • 1 large purple onion
  • 2 blocks feta cheese
  • 1 recipe Apple Cider Vinegar Salad Dressing

Thinly slice the apples and toss them with 1/4 c. salad dressing to prevent browning. Thinly slice purple onion and set aside. In a large bowl, toss 4 1/2 pounds lettuce mix with half of the remaining salad dressing in a large bowl. Top this salad with half the apples, one bag of cranberries, half the onion, half the walnuts, and one block feta cheese (crumbled). Repeat this process with remaining ingredients. Serve to a large group of hungry women.

This salad was awesome! I like that there was a combination of sweet, sharp, bitter, sour, and pungent flavors and also crunchy and soft textures. Very satisfying.

I rotate off the board this June, although I am going to continuing writing the newsletter. I will miss it, but for now I need to focus on my family a bit more. I'm sure I'll be back on some day!

Thursday, March 5, 2009

Random Thoughts

I won another contest this last week! This one was a bracelet giveaway by Brenda for the Fitness Friday Time Capsule post! This handmade beaded bracelet is really lovely and I've already worn it several times since I got it in the mail last Saturday. Posting about it today, I've learned something: it is very hard to photograph your own wrist and not have the picture be blurry. I took thirteen photos trying to get a perfect one, then gave up and used the first one I took after all!

In other news, Andrew now scoots and spins on his back! I think he can only do it when he is under his play gym and can hold onto a handing toy, but now that he has had a taste of moving around it won't be long before he realizes he can roll and scoot on his own!

Speaking of Andrew, I have started to let him cry it out more at night. Last night, he woke up to eat at 4:00 AM, and after I fed him, he was having none of this whole "going-back-to-bed" thing. He has also been fighting me on his morning nap and at bedtime. He went from a baby who went down for 2-3 naps and bedtime with relatively no problems, to this super fussy baby after these ear infections. He is no longer having ear pain, and I am sick of constantly getting a crying baby who should be sleeping and rocking and rocking and rocking, so at 4:30 this morning, with the crying keeping us from sleep, I asked Jerry, "Should I let him work it out?" When his response was, "You're going to have to eventually." I knew it was the time. ::sigh:: I know it won't take long because he was putting himself to sleep before all the illness, and I know that he has to learn to sooth himself, but this is hard on a mama's heart!

Finally, I had written that I was wanting to add more coconut to my diet. I have been doing that mostly with coconut oil so far and have really seen my appetite regulate with this and my poor, abused metabolism start to come to life. I decided it was time to add a new thing, so I made Coconut Corn Soup for lunch yesterday! It was so yummy! I was talking with my mom before I made it and described it to her. She thought it sounded yummy, and I knew I would have enough, so I invited her to come have lunch with us. So imagine my horror as I served up my soup and my husband reveals through a look of horror on his face with his first bite that he doesn't like coconut!! What? Who knew? We have been married for 11 years and I had no idea he didn't like coconut. Unfortunately for him, he was at a table with my mom and kids in addition to me, and Aaron was balking at the soup too, so he had to eat it! I felt bad for him because it was obvious that he really didn't like it. However, now I have a dilemma - I am wanting to add more coconut, and my husband doesn't like coconut. This could be problematic! Anyway, try the soup - it's really great!

Coconut Corn Soup
  • 1 can whole coconut milk (not lite)
  • 4 cups chicken stock (I used homemade - yum!)
  • 28 oz. fire-roasted chopped tomatoes
  • kernels from 4 ears of corn (I used 2 c. frozen)
  • 1/4 teaspoon cayenne pepper
  • 1/2 teaspoon dried thyme (I used marjoram because I was out of thyme!)
  • sea salt and ground pepper to taste (I used about a teaspoon of salt and no pepper)
  • I added about 1 c. shredded chicken leftover from making the chicken stock

Place all ingredients in a large pot over medium heat, bring to a simmer, and cook for 10 minutes.

Tuesday, February 24, 2009

An Interesting Lunch

What do you serve your kids for lunch when you realize that you are out of almost everything lunch-worthy? Why Banana Dogs, that's what!

Now don't look at me like you've never wanted to eat a banana in a hot dog bun smeared with peanut butter and topped with chocolate chips! You know you have! :o) The kids loved it. They couldn't stop smiling while they ate it.

I hope they enjoyed it, too, because another thing this lunch did was help get rid of yet some more preservative filled food. I am currently ridding my pantry. It is going to be a sad day for my kids when it is all gone, but I am tired of feeding my family things that aren't actually nourishing their bodies. I have dabbled on and off for the last four years with organic foods, whole foods, and basically eating in a way that nourishes our bodies instead of just filling us up. I cannot afford to go totally organic, nor do I think one has to in order to be healthy. But I have done a lot of research lately and what I am finding is motivating me to make small changes. I'll be writing more about this later, but one place I have been doing a lot of reading is the blog The Nourishing Gourmet. There's some really interesting stuff there. One change I have already made is adding some coconut oil and coconut products back into my diet. I used to do this, and stopped for some reason which I cannot now remember. I already am noticing some benefits. Read a bit about it here.

Sunday, February 22, 2009

Cookies for Cheaters

I think it is way too funny that my first post after my Fitness Friday post in which I admit that my greatest struggle right now is with chocolate is a post about making chocolate cookies! :) But, you know, sometimes you need to make cookies. The day we made these, I actually needed to make cookies. I read If You Give a Mouse a Cookie with my younger son, so we needed to make cookies for school that day. I purposely chose to read that on a Wednesday, too, so that we would make the cookies on the day that we have our church small group over to our house so that they could eat them and expand their hips.

Anyway....I have to give credit for this cookie recipe to my sister-in-law, Stephanie. When I was visiting her in Houston a couple weeks ago, she pulled out a cake mix to make cookies for the ice-cream sandwiches she was letting the kids make. (She's the cool aunt.) Perhaps I've been living under a rock, but I have never seen cookies made with a cake mix before! But it is a great recipe! It is fast, easy, and only has three ingredients. Oh, yeah, it is really tasty, too!

All you need to make these cookies is:
  • one cake mix, any flavor
  • one stick of butter, softened
  • two eggs

Mix all these together, then drop in spoonfuls on a cookie sheet and bake for 10-12 minutes at 350 degrees. That's right, couldn't be easier! That's why I feel like I am cheating when I make these cookies. And just look at the results:

For my cookies, I used a dark chocolate cake mix and then mixed in one bag of Andies Mint chips. My, my, were they good. I was good and only ate two of them, for which my hips thank me!


Thursday, January 22, 2009

Super Simple Sides

I really like vegetables, but I get tired of making the same old thing all the time. Our dinners usually consist of a main dish accompanied by either steamed broccoli, roasted veggies, or corn and either rice or potatoes. Boring. But my problem is that I don't want to dedicate time to making sides. I have decided that I need to have some super simple side ideas and I need to branch out a bit. This is my first attempt at that goal! I made this recipe by thinking about what flavors I might like together. Hope you enjoy!


Super Simple Sauteed Zucchini

Cast of Characters (This phrase is shamelessly borrowed from The Pioneer Woman. Check out her recipes - they rock!):

2 medium zucchini
1/2 cup corn
one large or two small shallots
2 tsp. olive oil
Herbamare seasoning
black pepper


First you need to get out your big, sturdy skillet. If, like me, you do not use non-stick cookware, spray it with a non-stick spray. Then heat about 1 tsp olive oil in the pan over medium high heat. Give the shallots a fine dice and saute them in the oil until they are nice and brown. I like to use shallots for this because they are more mild than onions and I think they match zucchini better because of that. But if you don't have shallots, by all means, use an onion. About 1/4 of a medium ought to do it.


Once the shallots are soft and brown, add another tsp of oil to the pan, followed by diced zucchini. I like my zucchini in about a half inch dice. This way the cook up nice and fast and are small enough that they are not too much bigger than the corn. I like my mixed veggies to all be roughly the same size for some reason...


When you add the zucchini to the pan, resist the urge to stir them right away. Just let them hang out in a single layer for a while so that they get nice and brown. If you have your heat high enough, this won't take too long and after you turn them once to get nice and brown on the other side, they'll have a perfect crisp-tender texture!

When you flip the zucchini the first time, go ahead and add the corn. This is best with frozen corn that has been thawed, or fresh corn cut from the cob. But I only had canned on this day, and it is fine that way too. In fact, this is a great way to use up leftover corn. After you add the corn, it is time to season the veggies. I like to use Herbamare seasoning. This is a really nice seasoned salt that can be found at natural food stores. It pairs great with veggies, fish, and chicken! If you don't have this, or another seasoned salt you like, kosher salt would work well. I also add pepper. I think some basil or thyme would be good here, too. Go crazy and try whatever spice sounds good at the time!

By the time the zucchini is browned on the other side, the corn will be heated through and this is ready to serve! Even with the chopping, this dish only takes about 15 minutes, and the results are worth the extra effort! I served this up with a yummy beef enchilada casserole! Yummy!

Friday, October 10, 2008

The Rest of My Menu

I know I am in danger of making this whole blog all about food, but lately it is all I have done. You know, cook. And sleep. And sit on the couch wishing I could sleep. Oh, and read other blogs. What a dangerous, time consuming occupation that is!

Anyway, all three of the recipes I chose from Pioneer Woman this week turned out great, and I liked the last two even better than the Migas! In addition to the recipes turning out well, thanks to Joanna's tips, I think my pictures of the results turned out better, too!
The Zucchini Farfalle was yummy and easy. It came together quickly. I did buy arrowroot since I had never used it as a thickener before. I liked how it worked. It doesn't take too much to do the job either. I don't think I would change anything about this recipe, and I'll make it again for sure!

On to enchildadas...mmmm...have I mentioned here before just how much I love Mexican food? I think it is in my blood after having lived the majority of my life in Texas. These were really good. Sadly, they were really time consuming as well. Too much so for me. I don't understand why you had to lightly fry the tortillas before then dipping them in the enchilada sauce and rolling them up. I also think that this would be so much easier to do as a casserole. Not as pretty of a presentation, to be sure, but easier. The next time I make it, I will put some sauce on the bottom of the pan, add a layer of tortillas, followed by layers of meat, olives, onions, and cheese before adding more sauce and starting over again. I really think this would be just as satisfying. And I'll get a chance to try it today, because I had SO much meat left over! Corn tortillas are small, and there is just no way to stuff 1 1/2 pounds of meat mixture into 14 tortillas! I had leftover sauce, too. Anyway, I highly recommend that you try this recipe. I doubt you'll be disappointed - even if you decide to do the very time consuming variety.

Wednesday, October 8, 2008

Migas My Way

One thing that I like about cooking is that it is not only a way to prepare nutritious food for my family, but often it is a means of self-discovery. Often times I am willing to try things in the kitchen, be brave and branch out even though I am not always willing to do that in other areas. I also learn things about my preferences, likes and dislikes, that I wouldn't learn if I wasn't trying new things. This is true about Migas. I was first introduced to Migas when Tina put them up for her entry in the recipe war on Mothers of Invention. I liked them, but I thought there were too many tortillas and I wanted more flavor. So when I found the recipe for Migas on Pioneer Woman Cooks, I was very excited to try it out! These were more to my liking.


I learned several things in the process of making these:

  • I really need to learn how to take good pictures of food. That looks way more disgusting here than it did in real life!
  • I don't like cilantro. Everyone else I've heard say they don't like cilantro thinks it tastes like soap. I don't think that, but I just don't like it! I guess I do like it in one circumstance. I like fresh salsa. I know there is cilantro in that, but I guess the other flavors are so strong that it is not too prominent for me.
  • I do not like the veggies in something to be a totally different texture from the rest of the dish. This recipe says not to cook the peppers and onions too long so that they are still a bit crunchy, but I will cook them until they are much softer next time.
  • I like migas with an equal number of tortillas and eggs. The first recipe I tried had twice as many tortillas as eggs. This one has twice as many eggs as tortillas. I think right in between would be perfect!

I fully recommend this recipe! I will make it again for sure.